guides
Last update:02 February 2017
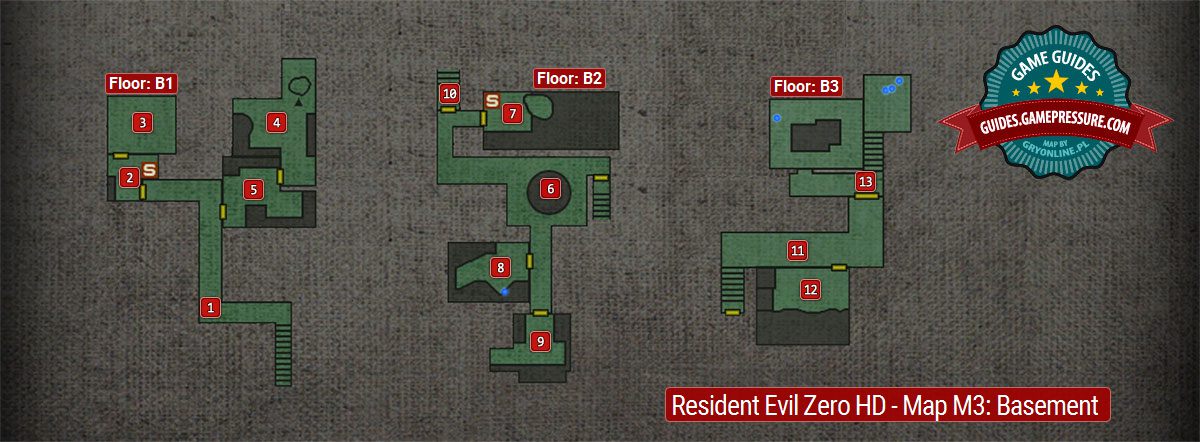
Descriptions of the rooms from the map
Corridor with spiders.
You get into the basement aftr solving the main hall puzzle (M2,3).
Room with the typewriter.
A monkey appears here later on.
A room where you boost Rebecca and allow her to reach (M3,4).
Rebecca solves a puzzle here involving setting the correct voltage.

Monitor room - it becomes accessible after solving the puzzle in (M3,4).
You’ll find zombies and ammunition here.
Room with the monkeys that you might reach from (M2,15).Animal statues puzzle must be solved here.

Area where Rebecca needs to be saved.
A typewriter is in here.
Room accessible after solving the puzzle in (M3,6).

Unity Tablet is here.
Room accessible after solving the puzzle in (M3,6).
Zombies and a document are in here.

Passageway leading to (M3,11).
Corridor filled with giant spiders.
Room with insects and a locker key.
Room with two levels.
Above, you’re able to see a map of the three-level Basement of the training facility.
Later in the game, you also unlock another passage, in the corridor behind the generator.
The walkthrough describes a suggested order of visiting the areas in the Basement.
There are references to the map in the text.
This site is not associated with and/or endorsed by the Capcom or Capcom.
All logos and images are copyrighted by their respective owners.
