guides
Last update:11 May 2016
Areas where you start side quests.
Areas you visit while completing side quests.
2 Area where you start the “Goblin Invasion” and “Speak to Ulvi” side quests.
2a “Goblin Invasion” quest: Area where you could talk to Ulvi for the second time.
“Intrusion in the North” quest: Area where you’re able to find the goblin scouts.
2c “Goblin Invasion” quest: Area where you could find Kalil.
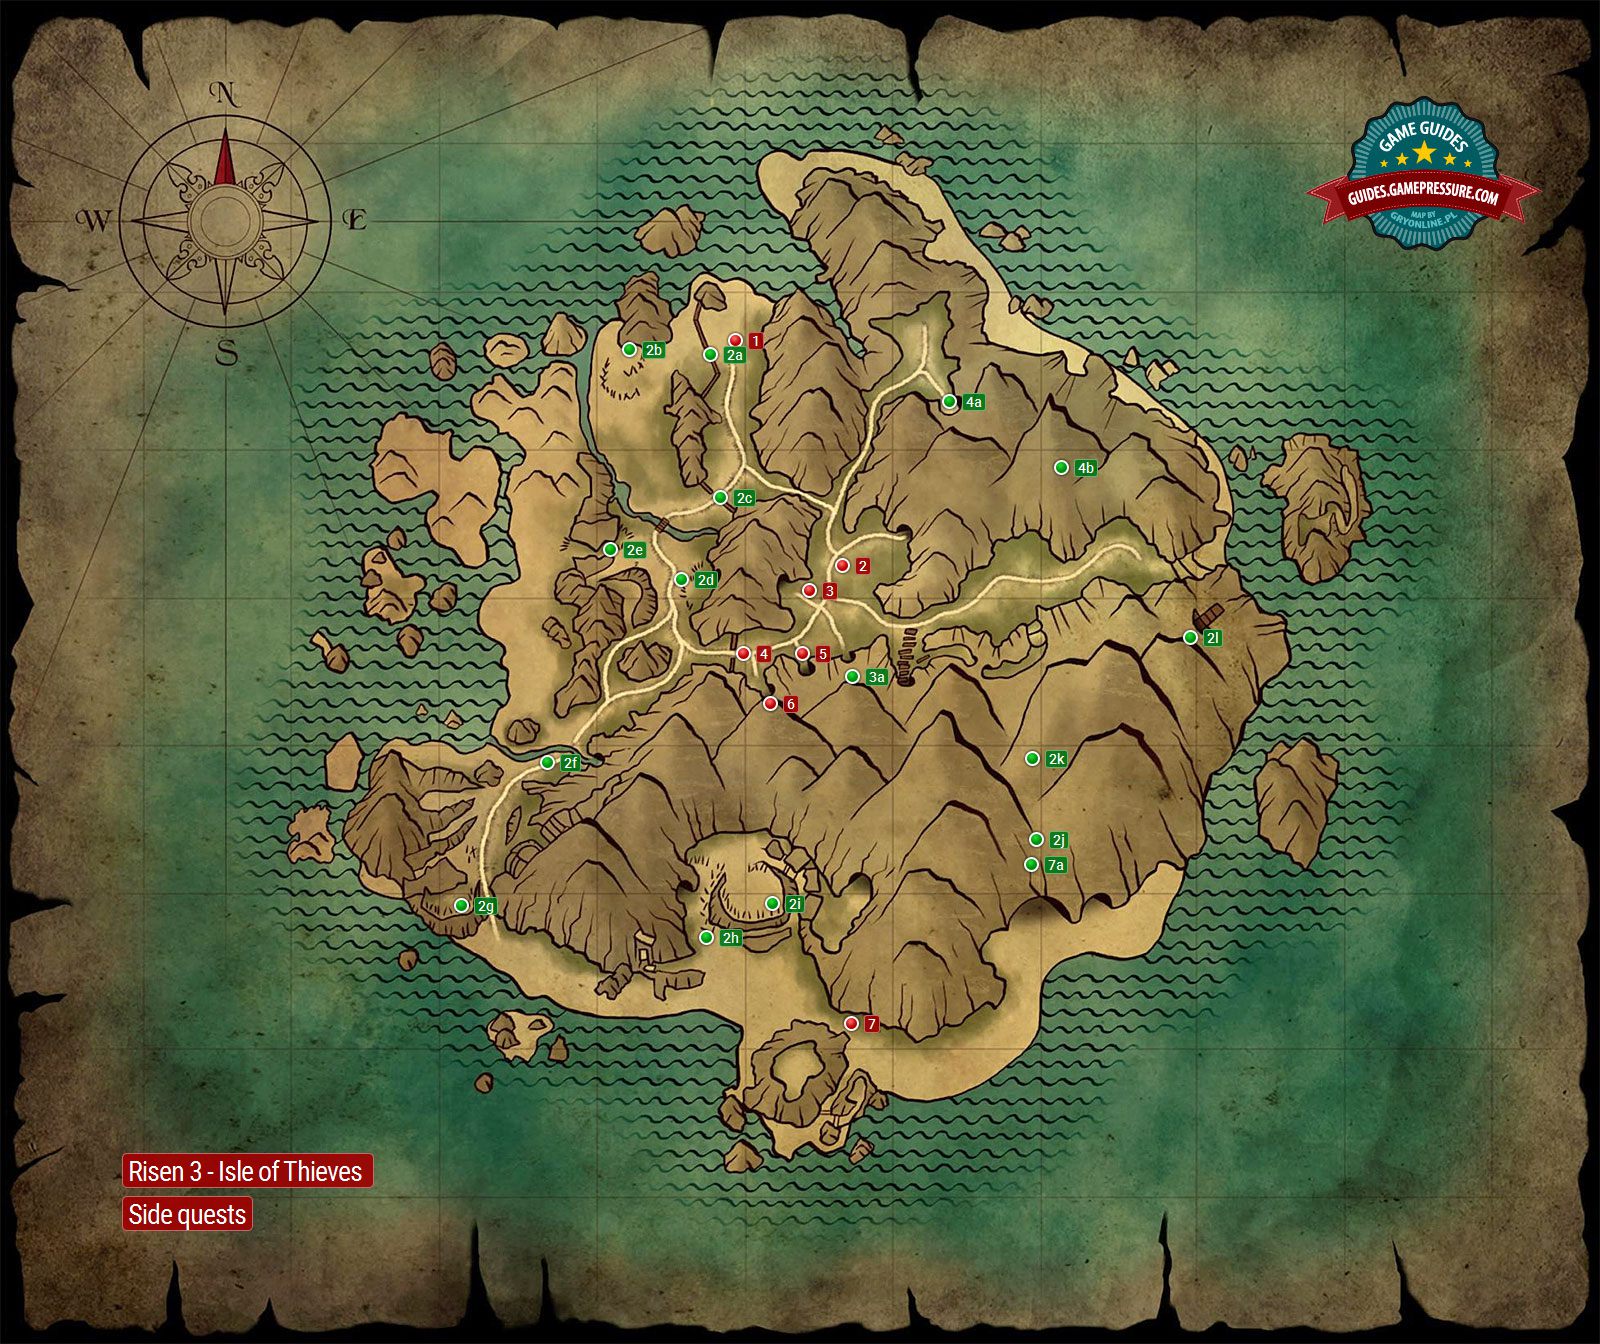
2d “Goblin Invasion” quest: Namik’s corpse.
2e “Goblin Invasion” quest: Area where the second artifact (Skull Thumper) is being stashed.
2f “Goblin Invasion” quest: Area where it’s possible for you to find Melih.
2g “Goblin Invasion” quest: Area where the third artifact (Opinion Amplifier) is being stashed.
2h “Goblin Invasion” quest: Area where you might find Famir.
2j “Goblin Invasion” (Inwazja goblinow): Entrance to the caves.
2k “Goblin Invasion” (Inwazja goblinow): Entrance to the goblin main camp.
2l “Goblin Invasion” quest: Area where you could find the Goblin King.
3 Area where you start “The Lucky Coin” side quest.
4 Area where you start the “A Scatterbrained Gnome” and “Escaped” side quests.
5 Area where you start the “Graveyard Gardener” side quest.
3a “The Lucky Coin” quest: Area where you might find Fidur.

6 Area where you start the “Gnome Riddle” side quest.
7 Area where you start “The Gnome Eater” side quest.
7a “The Gnome Eater” quest: Area where you’re free to find The Gnome Eater.
4a “Escaped” quest: Entrance to the cave.
4b “Escaped” quest: Area where you could find Russel.
The green points mark the areas that you visit while completing these quests.
This site is not associated with and/or endorsed by the Deep Silver / Koch Media or Piranha Bytes.
All logos and images are copyrighted by their respective owners.